Tuesday, December 18, 2012

Artizan Late War Germans in Winter Gear

  I recently competed a couple packs of Artizan's 28mm Late War Germans in winter outfits.  I plan on using these figures for the club's traditional New Year's Eve game day, and again for Cold Wars, in a GASLIGHT Pulp game called, "Santa Claus vs the Nazis."  Here is the game description as submitted to the Cold Wars PEL:
   "Bent on obtaining fabled and occult objects from across the globe, Hitler sets his sights on the magical factories of Santa’s North Pole workshops. If these factories could be turned to munitions production for the Third Reich, nothing would be able stop the Nazi war machine. The Fuhrer dispatches a team of commandos to capture Santa’s workshops. Can Santa, his elves, and toys stop the invaders, or will evil prevail? Children under 14 with playing adult only."

You can click on any photo to see it larger.


The figures will of course also  be very useful for historical scenarios too.  And will probably see service in the Bulge, and on the Russian Front.

 
  The figures were fun and easy to paint. I first sprayed them with gray Krylon primer, then drybrushed them with successively lighter shades of gray, working my way to white.  The baggy outfits have lots of great folds and creases to pick up the dry brushing.


The bases were painted white, then flocked with a mix of Woodland Scenics snow flock, white sand, and some old mica glitter.  Some were then detailed with either twigs, or rope fibers to represent dead grasses, or small white stones.

Sunday, October 7, 2012

Rome vs Carthage Using "Look, Sarge, No Charts: Fantasy, Ancients & Medievals" Rules

Saturday a group of us got together to start playtesting the Ancients part of, Look, Sarge, No Charts: Fantasy, Ancients & Medievals, aka LSNC:FAM. One of the HAWKs, James 'Tank' Nickle, had been preparing 10mm Roman and Carthaginian forces over the past few months and this was our first opportunity to put them on the table and try them out with the rules.
   We managed to get in two 4-player games in about 5 hours, and all the participants reported having enjoyed this first outing with the rules in an Ancients game.  We played in two teams of 2, and switched the sides we commanded between games, so everyone had a chance to command both the Romans and the Carthaginians.  Each player commanded a  Legion on the Roman side, or a mixed force of Spanish, Celts and Africans on the Carthaginian side.


A Roman Legion, in foreground, prepares to charge the first line of Carthaginian defenders.

The first game was a Carthaginian victory, with the superior numbers of Carthaginian horse able to make their way through the Roman cavalry on the flanks and into the Roman army's rear, just as one of the Roman legions stated to waver.  The second game was a Roman victory with the Romans able to seriously weaken one of the Carthaginian commands by shattering their Spanish and Celtic allies as well as damaging the the heavy armored Africans to a point where the much of the force was routed.
We uncovered a number of issues we need to work on, but in general, every one was pleased with the flow and feel of the game.

Now on to the photos from the first game...
A Roman Legion, consisting of Hastati, Princips, and Triarii, as well as Cavalry


Numidian Cavalry moves out to harass the Roman flank.

James Nickle, who's armies were were using, here commanding a Carthaginian force, advances his Spanish units

The Roman  Legion, on the right wing of the battle, hammers the African infantry (with the blue shields) as it enters the battle piecemeal.

James Nickle and Duncan Adams adjudicate the outcome of a melee, as Kurt Schlegel looks on. 

The beginning of the end for the Romans. With the remnants of the Roman cavalry fleeing before them, the Carthaginian cavalry swings around into the Roman rear, just as the line of Hastati breaks and flees the battle, right in the path of the onrushing enemy cavalry.

Friday, October 5, 2012

Giant Bat Swarms from Halloween Confetti

Over the years I have received a number of compliments on my giant bat swarm bases that I made from bat shaped Halloween confetti. I thought I would recreate the project on my blog in the form of a tutorial so others could copy this idea.   While I originally created them for use with 25mm armies, I now employ them with my 10mm forces.  The great thing about giant bats is that the scale is really flexible.
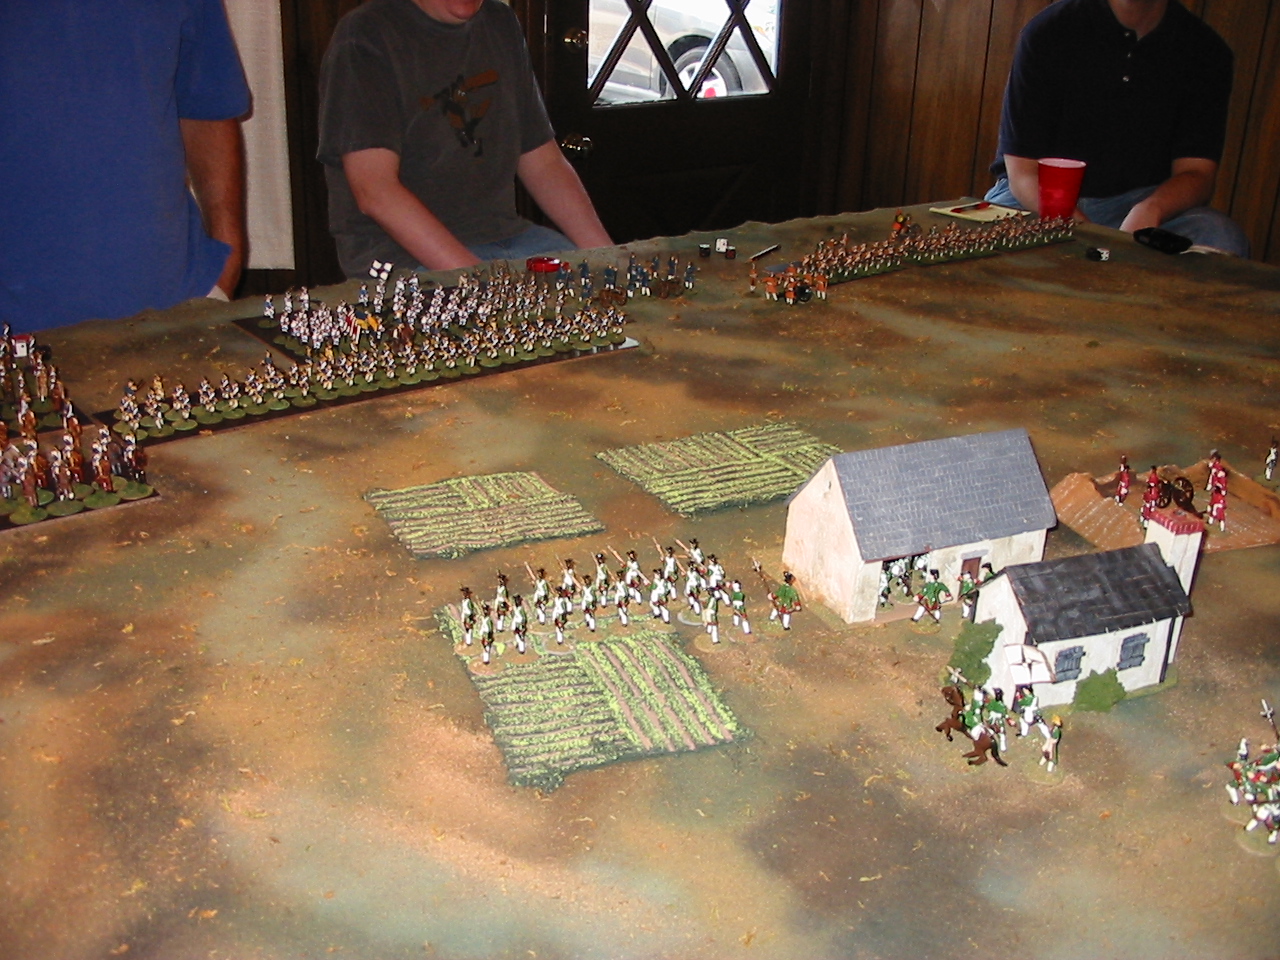
Here is a shot of my original giant bat swarm bases (seen on the bottom left).


And here is a shot of my new version, shown with a 25mm figure

So here's how I made the new giant bat swarm:


Bat shaped confetti from JoAnns.  All their Halloween decorations are already on sale.
I took a trip to JoAnn's Craft & Fabric store, and found this pack of bat confetti, while not the exact style I used in my originals, I thought the shape and size would be good for my purposes.
Step 1, gluing bats to their wire flight stands
The first thing I did was to cut six 3 inch sections of thin wire, and separated out six of the individual pieces of bat confetti.  At the end of each piece of wire I made a small "V" shaped bend, and then bent the "V" perpendicular to the rest of the piece of wire. I then superglued a bat atop each of the little "V" bends.  On some of the bats I bent the wings up or down a little to help give a look of them being in flight.
Adding glue to form the bat's 'body'
After the super glue dried, and the bats were firmly affixed to their stand, I ran a small blob of thick Tacky glue down the length of the body to help give it dimension and make it look less like a perfectly flat surface.
Gluing the bundled wires onto a steel fender washer.  Shown with a 25mm figure for scale.
After the Tacky glue 'bodies' dried, my next step was to twist all the wires together at the loose end, staggering the lengths a little,  to form a little bundled section abut an inch long.  I then made a right angle bend in this bundled portion and formed the bent part into a small semi circle to make a base to glue onto a washer.
After a flat black primer coat.
I then primed the whole thing flat black.  After the primer dried I drybrushed the bats with gray, and added two little red dot eyes on each.
After the painting was done I then flocked the base and finally gave the whole thing a protective spray with Testor's Dullcote.
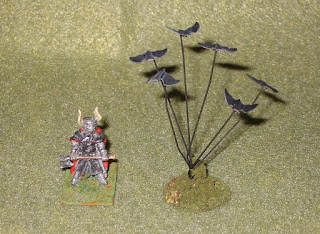
A shot of the finished Giant Bat Swarm. Shown with a 25mm figure
 
I'm pleased with how this base turned out.  I think in the future I might add a couple more bats to each base to make a slightly more dense swarm.

Friday, September 28, 2012

Reaper Kickstarter Project Manager Update

For those who may not have received the email.

FROM REAPER:

This is what you’ve been waiting for!


The Bones Post Kickstarter Pledge Manager is going live today!
There are a lot of you who have been anxiously awaiting this, and we appreciate your patience. It was a lot of work!
We’re going to ask you to hold on just a little bit more -- we’re sending out the emails with your access links in waves over the next day. Hopefully this will limit the flood of traffic and make for a smoother experience for everyone as you tell us your final choices for your pledge allocation.
Be on the lookout for your email and your log-in link.
Make sure you’re accepting messages from webmaster@reapermini.com. That’s where the email will be coming from.
With the pledge manager you’ll be able to:
- Give us your shipping address.
- Add to your initial pledge and get more stuff.
- Use PayPal or a credit card for payment of stuff beyond your initial pledge.
- Adjust your pledge if your math was off or you didn’t add any money for shipping (international backers).
- Upgrade your pledge level. With limits. Most everyone can upgrade to Vampire, but only undertakers can add undertaker packages, for instance.
- Trade your Kickstarter Sophie models in for credit or upgrade them to the Urban Legends version.
Some potential "gotchas" to keep in mind:
- The pledge manager doesn’t store your choices in the database until the very end. This will help with the traffic and keep us from crashing. If you leave and come back, there’s a good chance you’ll have to start over.
- The pledge manager will accept your input for about 10 days. After that we’ll lock you in at your pledge level. We need to get moving on the final orders so we can get these figures done by March. Don’t worry, we’ll remind you before we shut it down.
- After you’re all locked in, you’ll be able to update your email address and shipping address in case that changes between now and then.
Please help everyone out by letting all of your friends know, just in case they miss both this update or their email when it get’s sent out.
Minor Change of Plans:
In other news, due to circumstances beyond our control, two of our elves we were going to produce from the concept art will now be based on two existing models. The original ones are hung up at the sculpting phase, and we can’t wait any longer. We picked models that are pretty similar to the concept art and they’re already headed to production so we can hit that March deadline. Check ‘em out (see below).
Moving Production to Texas Update:
We’re making good progress moving Bones production to Texas. We’ve picked out a beastly beauty of an injection machine, but we have to wait for the final quote for this round of production from China before we can know if we have enough cash left over to cover all the initial bells and whistles. It’ll be awhile before we’re going full swing, but we’re getting there.
Did you know it takes around 3 or 4 months just to get the machine delivered for installation after you purchase it? Apparently, they build them to order and don’t have an inventory just sitting around -- go figure! (...how many do they sell a year, I wonder? Not many I bet.)
Anyway, keep an eye out for that email with your Pledge Manager log-in, and thanks from all of us at Reaper!

Monday, September 24, 2012

NQSYW Imagi-Nation Battle Report

This past Saturday the forces of the Pragmatic Coalition(Booo!)and the Northern Alliance(Yay!) met again on the field of battle in another engagement in our "Not Quite Seven Years War"(NQSYW) project using 40mm homecast figures and the vintage "Charge!" rules. Readers may remember that we had a battle last month(See:http://onemoregamingproject.blogspot.com/2012/08/nqsyw-and-uncharted-seas-game-day.html for a full report) during which the forces of the Northern Alliance, with North Polenburg in the fore, handed the Pragmatic Coalition armies a sound defeat at the Battle of the Bridge. I, as the overall commander of the North Polenburg armies, gave much of the credit to my "General's Hat" which surely struck awe into our foes. This time around, sadly, my hat had no such effect.
     This latest scenario, GM-ed by Rob Dean, focused on the defence of two small hamlets and a redoubt by the Armies of North Polenburg. Even though our objectives only required us to hold the northern most redoubt (as well as the two hamlets), there were three redoubts on the table, each manned by a cannon and crew. Arrayed against us was a Pragmatic Coalition army comprised mainly of units from Rob Dean's Schoeffen-Buschhagen Army and Norman Dean's Wachovian forces.   However valiantly we tried to defend our objectives, the day was carried by our enemies.
The commander surveys his forces. My General's Hat couldn't help me this time... 

A look at the North Polenburg deployment; The 1st  Regiment "The Hawks" is in the foreground, the Queen Jennifer Regiment holds the center, and behind them is the 32nd Dragoons on their all white mounts.  Our objectives were to hold the hamlet to the south (just visible at the bottom of the picture, the other hamlet in he center, and the redoubt in the far distance near the top left corner of the table.  Unseen in the far woods, is a hidden light company from the Queen Jennifer Regt.

The forces of the Pragmatic Coalition arrayed against us, launch their attack.

The opening of the battle.  Schoeffen-Buschhagen's (SB) Prinz Norman Dragoons charges the 1st Company of the Queen Jennifer (QJ) Regt. as the 32nd Dragoons charge up in support. 

A fateful turn in the battle.  For some reason that even now I can't explain, I throw my dragoons out into a line in the face of the approaching infantry. It seemed like a good idea at the time....

And the result:  The SB vonNordhafen Regiment opens fire on the 32nd Dragoon's 1st Squadron, eliminating 2/3rds of them in a single volley the 3rd squadron on the right flank fared little better, while the 2nd Squadron in the center successfully meleed the Prinz Norman Dragoons  facing them.

Meanwhile, the SB King Rupert Jaegers have stumbled upon our hidden light company (red facings) in the woods, taking a hard volley that kills three of them.  Both units then charge into melee.

The 1st Company of the QJ Regt. falls back to regroup after their melee with the  Prinz Norman Dragoons.  The regiment's vivandiere offers them water, as the nearby colonel of the regiment keeps an eye on the defence of the hamlet's barn.

As the first Pragmatic Coalition regiment (SB Adelmann Regiment) storms the hamlet's barn, the QJ Grenadiers march forward to hold the wide open left flank. Meanwhile the remnants of the shattered dragoons regroup themselves.

Boxcars!  The 2nd Company of the QJ Regt., holding the barn, deliver a shattering volley to the SB Adelmann Regiment, as they try to storm the barn.  The enemy regiment is soon after reduced to less than 50% strength and must withdraw from the field. But not to worry for them, as a fresh Pragmatic Coalition regiment (2 Companies of Weigenbugers and an attached Company of SB Schultheiss) moves up behind them to take their place.

The loss of the northern redoubt.  A company of SB von Nordhafen prepares to charge the redoubt, the gunners (North Polenburg engineers pressed into service due to a lack of artillery figures) scatter at the sight of the approaching enemy.

The heroic stand of the QJ Grenadiers.  The grenadiers manage to kill enough of the charging cavalry to force them to retire, meanwhile on their right, the QJ 1st Company moves back up to close the gap between the Grenadiers and the 2nd Company in the barn.

Meanwhile, on the North Polenburg right, the 1st Regiment (The Hawks) is still holding as the Wachovian Regt. try to force one company of  "the Hawks" from the hamlet, as a company of Wachovian Dragoons has made its way around into one of the redoubts where another "Hawks" company is stubbornly defending.  The central redoubt has already fallen to a company of Wachovians.   The enemy has also brought up three guns to try and batter the unit defending the hamlet on the right. 

The end is near.  The Wiegenburgers Regt. prepares to fire upon the already damaged QJ 1st Company.  The resulting casualties, plus further casualties on the Grenadiers from their melee with the von Nordhafen Regt. , puts the Regiment below 50%, and it is forced to retire from the field.

The scene at the end on the right.  "The Hawks" still hold the redoubt, but are in danger of losing the hamlet, and try to move up their reserve company to defend it.  But with the Queen Jennifer Regiment retreating from the field on their left, the cause has become hopeless.
Even though my co-commander, Steve Gelhard, and I lost; it was still a really fun game, and as always, visually spectacular to witness.  I am already looking forward to our next encounter and North Polenburg's chance to avenge themselves.

Monday, September 17, 2012

HAWKs' BARRAGE XVI Game Day a Success

The HAWKs held their one day BARRAGE XVI miniatures gaming convention this past Saturday, September 15th. By all accounts it was huge success with a record attendance and  record number of dealers present in a new spacious and well lit venue.
There was a large selection of great looking games as well as a whole table dedicated to just kids games.  There was also a Flames of War tournament at the convention this year.
   The club is already making plans for next year.

An overview of the new convention site, The Havre De Grace Community Center.

This year the HAWKs had a well attended Flames of War tournament at the convention. The sponsors are looking forward to coming back again next year.

Mark Fastoso's The Tower Helmets WWII North Africa game using "Fireball Forward" rules.

Whoever is worried about the graying of the hobby, fear not; the HAWKs were pleased to see  a large number of kids come along with their folks for a day of gaming, and not just at the kids table.

Steve Gelhard's "Shako II" Napoleonic game.

A close up of the "Shako II" game, Morning of Morengo


David Cochran's Belisarious vs. the Visigoths game, using modified "Kings of War" rules.

Gamers had a several dealers and flea marketers to shop at during the con.

A view of the hall mid day during the peak of the action.

Another view of the hall.

I ran a series of four well received, hour long, "Look, Sarge, No Charts:WWII" demo games.

A last minute addition to the game line-up was this War of the Worlds game using GASLIGHT rules. The hosts did a great job in what was apparently the first convention game they ever ran. 

Kurt Schlegel's Attack on Santa's Village game, using GASLIGHT rules, was a big hit with the kids.

P. Heffner's Aerodrome games are always a big hit at Barrage with kids and adults alike.

Sunday, September 16, 2012

Another "Look Sarge, No Charts: Fantasy, Ancients, & Medievals" Playtest

Set up for our club's one day miniatures gaming convention, BARRAGE XVI, happened to fall on one of our regular meeting nights this year, so we decided to just go ahead and hold our meeting after we were finished getting ready for the convention, right there in the Community Center where we were setting up
    . One of the games we ran was another playtest of our under-development "Look,Sarge, No Charts: Fantasy, Ancients, & Medievals" (LSNC:FAM) rules, using 10mm figures. This was the first run of these rules for the club at large, and in general they were very favorably received. We still have a number of kinks to work out, but I'm really thrilled by the look and feel of the games so far.

A Goblin hoard with bats, giants, and a giant spider attached.

On the left flank of the "Good" side, High Elf cavalry tries to stem the on-rushing "Evil" hoards of minotaurs, demonic trees, and evil giant eagles. 

An overview of the table.

In the center of the battle, High Elf infantry, backed up by legions of Wood Elves, faces off against an assortment of evil humans and dwarves.

Another view of the table.  In the end, though the side of "Good" had broken through the center of the "Evil" side's line, both of their flanks were soundly beaten by the forces of "Evil", so the "Evil" forces were declared the victors